
Get insights like this delivered to your inbox
Join 2,500+ GTM professionals. No spam, unsubscribe anytime.
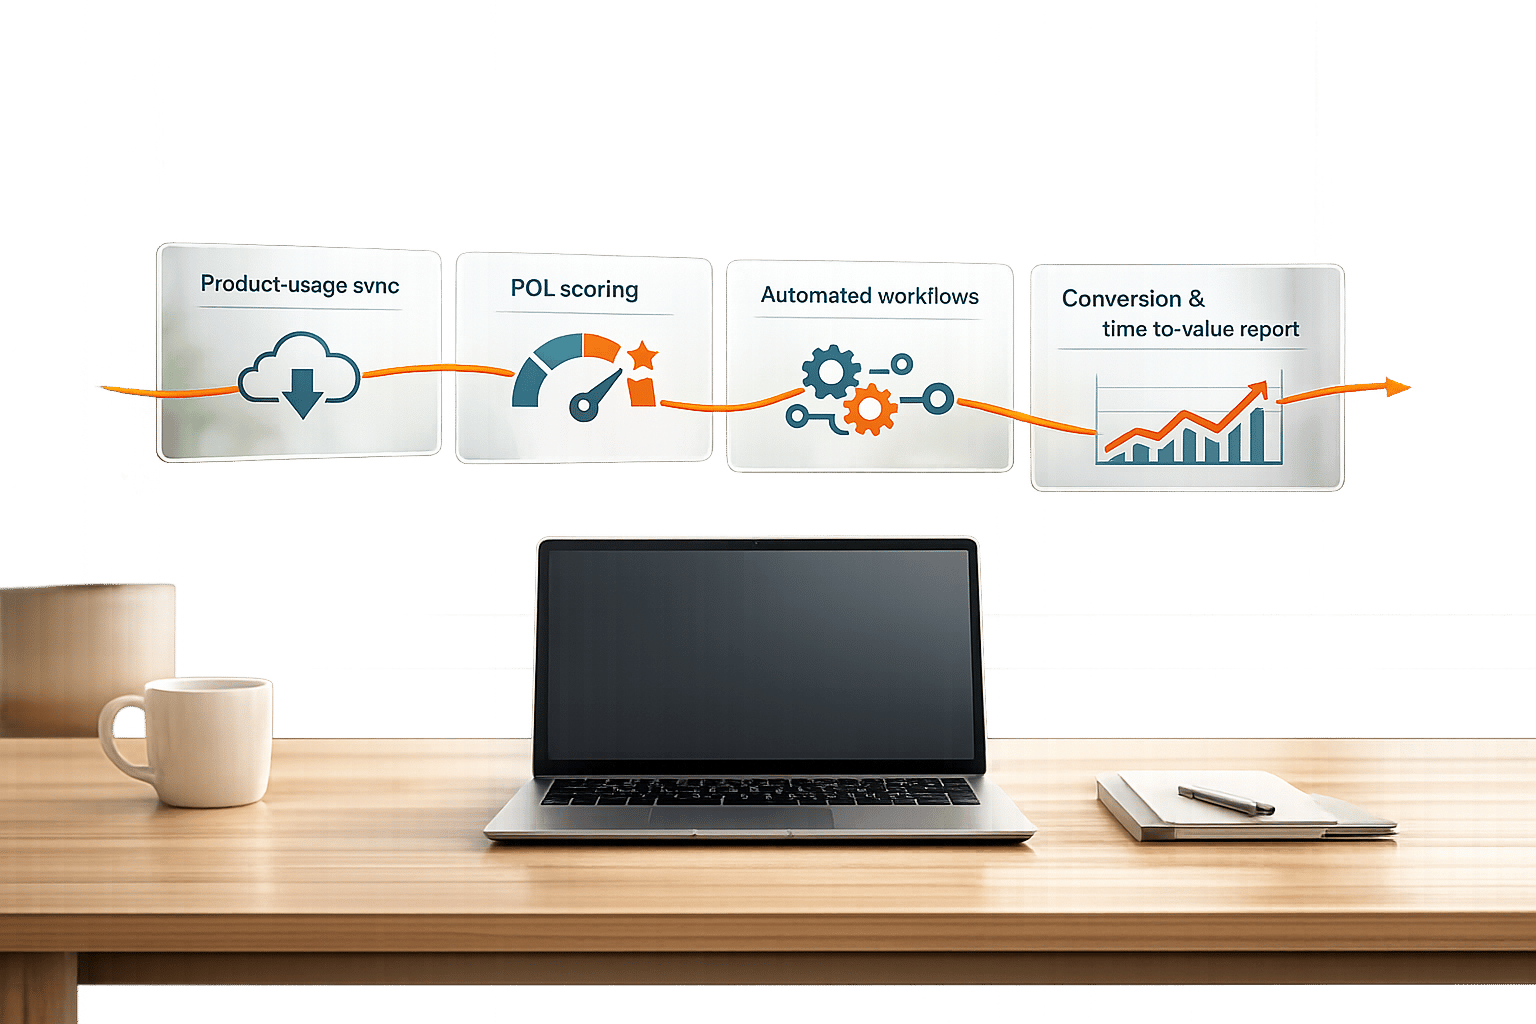
Subscribe to NewsletterCustom middleware is the solution when HubSpot's native integrations can't handle your complex workflows or two-way data syncing needs. Acting as a bridge between HubSpot and external systems, middleware ensures smooth data flow, handles API quirks, and manages tasks like field mapping, error handling, and synchronization. Without middleware, direct system-to-system connections can lead to unmanageable setups, duplicated logic, and API quota issues. For B2B SaaS companies, middleware can save time, reduce errors by over 90%, and improve overall efficiency.
Key Takeaways:
- Why Middleware Matters: Avoids "vampire records", handles API rate limits, and prevents operational bottlenecks.
- Benefits for SaaS: Saves time, reduces errors, and creates a unified data architecture.
- Technical Needs: Requires skills in OAuth 2.0, API handling, and backend frameworks like Node.js or Python.
- Building Steps: Set up authentication, define data mapping, develop middleware logic, implement error handling, and deploy with monitoring.
Middleware simplifies integrations, improves data accuracy, and ensures scalable workflows for growing businesses.
Mastering HubSpot API: Pt. 1 Platform Integration with Custom Coded Actions. Operations Hub
sbb-itb-69c96d1
Prerequisites for Building Custom Middleware
Before diving into custom middleware development, ensure you meet the necessary requirements outlined below.
Technical Requirements
Creating custom middleware for HubSpot demands specific technical skills and proper access credentials. Start by obtaining a free HubSpot developer account. This grants you tools to create apps, manage sandbox environments, and generate authentication credentials.
A solid understanding of authentication methods is crucial. You’ll need to know OAuth 2.0 for multi-tenant apps and how to use Private App Access Tokens for single-account internal tools. As the HubSpot Developer Blog emphasizes:
"The gap between a working integration and a production-ready one usually comes down to how well you handle tokens."
Proficiency in programming languages like Node.js, Python, or Java is also key, as HubSpot offers official client libraries for these. Additionally, you should be familiar with RESTful API principles, including HTTP methods and JSON data structures. Handling pagination (limit and offset parameters), implementing exponential backoff for 429 rate limit errors, and ensuring idempotency during retries are also essential skills.
Here’s a quick breakdown of the required knowledge and tools:
| Skill Category | Required Knowledge/Tools |
|---|---|
| Authentication | OAuth 2.0, Private App Tokens, Token Refresh Logic, Scopes |
| Security | HMAC SHA-256, AES-256 Encryption, Secrets Management, HTTPS |
| Data Handling | JSON, CRUD, Batch Processing, Pagination, Search API |
| Backend | Node.js, Python, Java, Express.js, Nest.js, Redis |
| DevOps | Webhook Handlers, Rate Limit Throttling, Error Logging, Tunneling |
Once you’ve checked these boxes, the next step is setting up your development environment.
Development Environment Setup
Your development environment should include the right tools and configurations. Start with Node.js (version 16.10+ or 18+) or Python, paired with a web framework like Express.js or Fastify for server-side logic and webhook handling.
Since HubSpot webhooks require a public HTTPS URL, you’ll need a tunneling tool like ngrok or Tunnelmole (an open-source alternative) to expose your local environment to the internet. This setup allows you to test webhook notifications in real time without deploying to a production server.
For managing data and preventing issues like race conditions during token refresh, Redis is invaluable. It helps with distributed locking and deduplicating webhook events. To securely store client secrets and access tokens, use a secrets manager such as AWS Secrets Manager, Google Cloud Secret Manager, or HashiCorp Vault - never store sensitive information in plain text or client-side code. Tools like Postman, Insomnia, or Apidog can also be useful for testing OAuth flows and inspecting JSON payloads before diving into development.
With your environment ready, the next step is to familiarize yourself with HubSpot's API documentation.
Understanding HubSpot API Documentation
Navigating HubSpot’s API documentation effectively is critical for successful middleware development. Always use the latest v3 endpoints (e.g., /crm/v3/objects/contacts) to ensure access to the most stable features and security updates. Keep in mind that HubSpot handles over 150 million API calls daily, making it essential to understand and respect rate limits.
The API Explorer, a built-in "Try-It" sandbox, is a great tool for testing real-time queries against your portal. It helps you validate parameters and view response schemas. The documentation also includes ready-to-use code samples in Curl, JavaScript, Python, and Node.js for each endpoint.
Understanding HubSpot’s object model is equally important. Learn how objects (like contacts and deals), records (individual entries), properties (fields), and associations (links between records) are structured. Instead of polling all records, use the /search endpoint for targeted queries. Batch endpoints like /batch/read allow you to process up to 100 records in one call, which can reduce API quota usage by up to 80% compared to updating items individually.
Lastly, subscribe to the API changelog RSS feed to stay updated on breaking changes and deprecations. HubSpot typically provides a 90-day migration window for updates, giving you time to adapt your middleware accordingly.
How to Build Custom Middleware: Step-by-Step
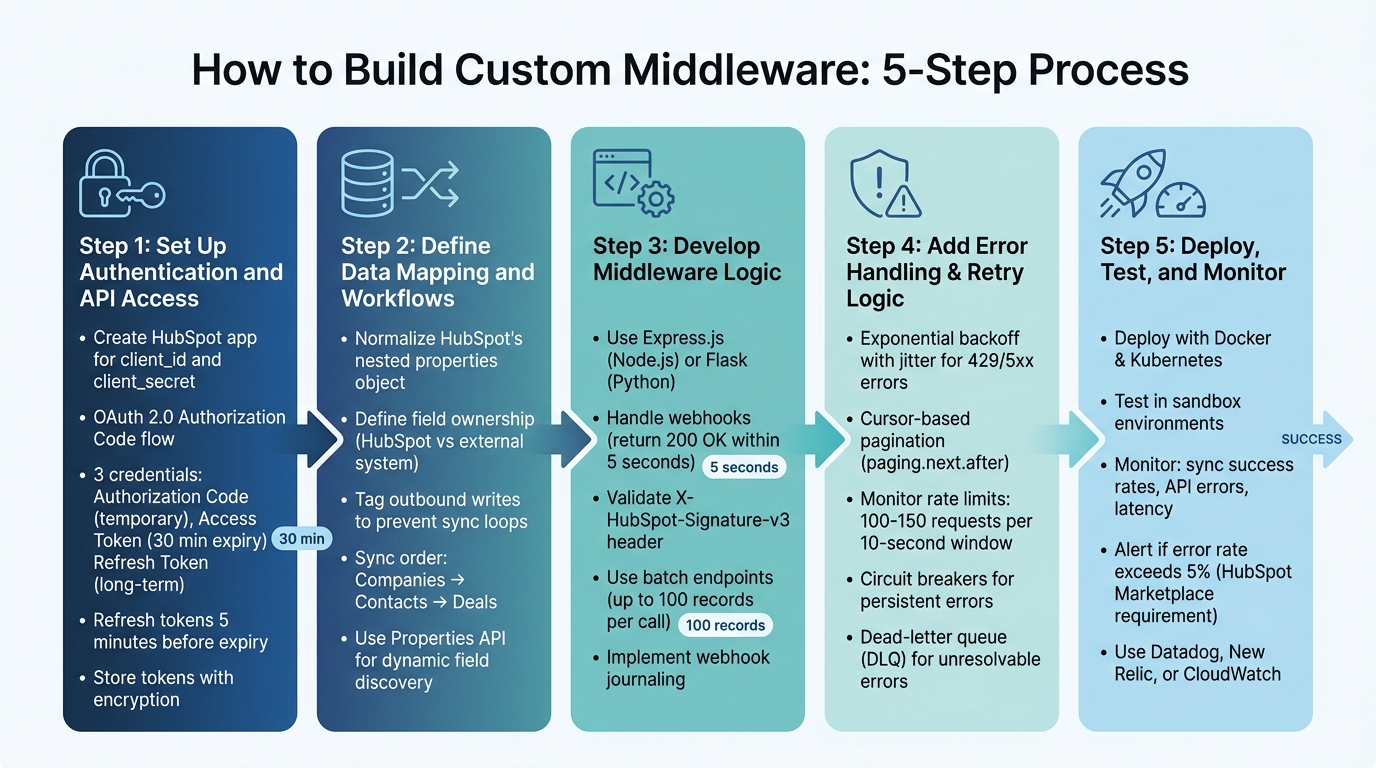
5-Step Process for Building Custom HubSpot Middleware
Once your environment is configured and you’ve familiarized yourself with the HubSpot API, you’re ready to dive into creating middleware. Below, we’ll break down the process into five practical steps, turning your setup into a fully functional integration.
Step 1: Set Up Authentication and API Access
Start by creating a HubSpot app to get your client_id and client_secret. HubSpot uses the OAuth 2.0 Authorization Code grant type, which involves four main steps: generating an authorization URL, obtaining user consent, handling the redirect with an authorization code, and exchanging that code for tokens.
This process will give you three key credentials:
- Authorization Code: Temporary and single-use.
- Access Token: Expires after 30 minutes.
- Refresh Token: Long-term and used to generate new access tokens.
For modern HubSpot API versions (v3 and 2026-03), sensitive parameters like client_id and client_secret must be sent in the request body as application/x-www-form-urlencoded instead of query parameters. Build logic to refresh tokens five minutes before they expire, and store all tokens securely using encryption.
| Parameter | Required | Description |
|---|---|---|
client_id |
Yes | Identifies your app; found in app settings. |
scope |
Yes | URL-encoded, space-separated list of permissions requested. |
redirect_uri |
Yes | URL where users are directed after granting access (must use HTTPS for production). |
state |
No | Unique string to maintain state and prevent CSRF attacks. |
grant_type |
Yes | Set to authorization_code for initial tokens or refresh_token for updates. |
Once authentication is secure, you’re ready to define how data will flow between systems in the next step.
Step 2: Define Data Mapping and Workflows
Data mapping is crucial for ensuring smooth communication between HubSpot and your external systems. HubSpot’s API returns data in a nested properties object, so your middleware will need to normalize these fields. For instance, convert properties.firstname into first_name for compatibility with external systems.
Handle delimited strings, such as hs_additional_emails, by transforming them into arrays if your external system requires structured data. Clearly define field ownership to avoid overwriting critical information. For example:
- HubSpot might manage lifecycle stages and owner assignments.
- Your external system could handle usage metrics.
- Fields like name or phone number might require bidirectional updates.
To prevent infinite sync loops (often called "vampire records"), tag each outbound write with a unique source identifier (e.g., _sync_source). Your middleware should ignore incoming webhooks containing its own tag. When syncing, follow object dependencies: sync Companies first, then Contacts, and finally Deals to maintain data consistency.
"Poor data quality costs organizations at least $12.9 million a year on average." - Gartner
Instead of hardcoding property names, use the Properties API (GET /crm/v3/properties/contacts) to dynamically discover custom fields in a HubSpot instance. Before updating HubSpot, fetch the current value and compare a fingerprint - if the fields match, skip the update to save API quota and avoid unnecessary writes.
Step 3: Develop Middleware Logic
Now that your data mappings are defined, it’s time to build the middleware itself. Use a web framework like Express.js (Node.js) or Flask (Python) to manage API endpoints and webhooks. Your middleware serves as the go-between, transforming data and routing it to the appropriate system.
Set up endpoints to handle HubSpot webhooks. When a webhook is received, validate the signature and return a 200 OK response within five seconds. Queue the data for processing later to avoid timeouts and prevent HubSpot from retrying the webhook.
For security, validate the X-HubSpot-Signature-v3 header using constant-time comparison to prevent timing attacks. Reject requests with timestamps older than five minutes to guard against replay attacks. Consider implementing webhook journaling for better tracking. HubSpot’s V4 Webhooks Journal API allows you to replay changes for up to three days.
Leverage batch endpoints like /batch/read to process up to 100 records in a single API call, reducing the total number of requests. While HubSpot supports batch upserts by email, using a custom unique property (like an external Customer ID) offers cleaner semantics and avoids issues with partial upserts.
Step 4: Add Error Handling, Pagination, and Retry Logic
Strong error handling is what separates reliable middleware from a basic integration. Implement exponential backoff with jitter for handling 429 and 5xx errors. Adding jitter (randomized delay) prevents multiple retries from overwhelming the system at the same time.
HubSpot’s CRM v3 API uses cursor-based pagination with opaque cursors (paging.next.after) instead of page numbers. This requires sequential processing, as you can’t skip pages. For large datasets, partition queries into smaller chunks using date ranges.
Monitor rate limits through headers like X-HubSpot-RateLimit-Secondly-Remaining and X-HubSpot-RateLimit-Daily-Remaining. Use the Retry-After header to delay retries when you hit a 429 error. HubSpot’s API limits typically allow 100–150 requests per 10-second window, with daily caps based on your subscription tier.
| Error Code | Meaning | Recommended Action |
|---|---|---|
| 400 | Bad Request | Validate inputs; do not retry without fixing errors. |
| 401 | Unauthorized | Refresh OAuth token immediately. |
| 429 | Rate Limit Hit | Pause and retry with exponential backoff and jitter. |
| 409 | Conflict | Check for duplicates and resolve conflicts. |
| 502/504 | Timeout | Reduce batch size, simplify queries, and retry. |
Consider using circuit breakers to halt requests temporarily if persistent errors occur, preventing further strain on the system. Route unresolvable errors to a dead-letter queue (DLQ) for manual review. In multi-server setups, use a distributed rate limiter like Redis to manage burst limits across all nodes.
Step 5: Deploy, Test, and Monitor
Deploy your middleware using tools like Docker for containerization and Kubernetes for orchestration. These tools help with auto-scaling and load balancing.
Before going live, run extensive tests in sandbox environments. Validate OAuth flows, data mappings, and webhook handling. Test edge cases like rate limits, token expiration during long syncs, and network failures. Ensure deduplication logic works and retry mechanisms don’t create inconsistencies.
Set up monitoring for key metrics like sync success rates, API error rates, latency, and webhook processing times. Configure alerts for error rates exceeding 5% of daily requests - a requirement for HubSpot Marketplace certification. Use tools like Datadog, New Relic, or CloudWatch to monitor API activity, pinpoint bottlenecks, and troubleshoot issues in real time.
To optimize performance, request only the specific properties you need using the properties query parameter. This reduces processing time and minimizes unnecessary API calls.
Advanced Features with Vestal Hub
Once you've deployed and monitored your custom middleware, it's worth exploring advanced features to make your integration even more effective.
Vestal Hub brings over a decade of experience with HubSpot and has completed more than 100 projects, earning its status as a HubSpot Gold Solutions Partner with a flawless 5-star rating. Their advanced features are designed to streamline deployment and deepen integration capabilities.
Unified Data Architecture and Automated Workflows
Vestal Hub’s middleware solutions create a unified system, acting as a single source of truth for your business. With real-time data syncing, custom data models, and robust data governance, they ensure your CRM, marketing, and sales systems work together seamlessly as your company grows.
"We developed an advanced intent-signals-based lead system... This has substantially reduced our close times and increased our ACV. We have doubled in size month over month."
- Travis Murdock, Head of GTM at SEED
Their strategy combines technical expertise with revenue operations (RevOps) planning, helping you get the most out of your HubSpot integration. Pricing for their services varies between $1,900/month and $4,900/month, depending on the complexity of your integration needs.
OpenAI-Powered Data Transformation
Vestal Hub takes integration a step further by incorporating AI capabilities. They use OpenAI workflows to automate schema detection and mapping, drastically cutting down on manual setup time. Their middleware can process unstructured data - like call recordings, email conversations, and meeting notes - to generate actionable CRM summaries. For lead scoring, large language models (LLMs) analyze factors such as company size, industry fit, and engagement history, providing more precise prioritization tailored to your Ideal Customer Profile compared to standard tools.
Scalable and Secure Middleware Deployments
For enterprises, scalability and security are non-negotiable. Vestal Hub offers middleware solutions built with enterprise-grade infrastructure and strict data governance protocols, ensuring your systems remain reliable as your business expands. Their certified HubSpot specialists continuously monitor and troubleshoot integrations, preventing issues before they disrupt operations.
"Working with Vestal Hub has been game changing. Their speed to value is incredible! Their engagement model via slack and weekly planning supports both adhoc tactical changes and larger project implementations."
- Erin Parker, Head of Revenue Operations at a Series B company
Vestal Hub offers unlimited tasks for a fixed monthly fee, and you can pause your subscription whenever needed. This flexibility ensures you get tailored support without unexpected costs.
Conclusion
Main Points Recap
Custom middleware is a game-changer for B2B SaaS companies looking to streamline how HubSpot integrates with their tech stack. It eliminates the headaches of disconnected systems and manual processes by creating a unified layer that handles critical functions like authentication, data mapping, rate limits, and error recovery - all automatically.
HubSpot's strict token expirations (30 minutes) and rate limits (110 requests per 10 seconds) make precise engineering a necessity. When implemented correctly, companies can save up to 4 hours every week and reduce data entry errors by over 90%.
For businesses with unique needs or legacy systems, working with specialists such as Vestal Hub can speed up deployment and introduce advanced features like AI-driven data transformation and enterprise-level security. This approach ensures predictable costs while offering scalable and flexible solutions.
Next Steps for Implementation
With the benefits and challenges in mind, it’s time to chart your path forward. Start by auditing your tech stack to identify gaps in data flow. Determine which system will "own" specific data attributes - like using QuickBooks for invoice totals and HubSpot for deal stages - to avoid conflicts later. This step provides the foundation for designing your middleware architecture.
If you're building middleware in-house, plan for an initial development timeline of 7 to 12 weeks and account for ongoing maintenance as HubSpot updates its API. A smart move is to launch with a read-only pilot to test your data mapping before enabling full bidirectional data syncing. For a faster rollout and access to tried-and-tested integration patterns, consider teaming up with experts like Vestal Hub.
FAQs
Do I need custom middleware or will a native HubSpot integration work?
When deciding between the two, it all comes down to what your business requires. Native HubSpot integrations are fast to set up, come with built-in support, and work well for straightforward connections.
On the other hand, if you're dealing with complex needs - like managing large data volumes, syncing data both ways, or connecting multiple systems - custom middleware offers greater flexibility, scalability, and control.
If your workflows are simple, native integrations might do the job. But for more tailored, large-scale demands, custom middleware is usually the smarter choice.
How do I prevent duplicate records and sync loops in two-way syncing?
To avoid duplicate records and sync loops in two-way HubSpot integrations, it's essential to follow some smart strategies:
- Deduplication keys: Use unique identifiers, such as external IDs or specific properties, to match records accurately between systems.
- Idempotent webhook handling: Validate webhook signatures to ensure each event is processed only once, preventing multiple triggers.
- Safe upsert logic: When updating or creating records, implement logic that checks for existing data to avoid duplicates.
- Delta sync patterns: Focus on syncing only the changes (deltas) rather than the full dataset, which helps prevent infinite loops and reduces unnecessary API calls.
By adopting these practices, you can maintain cleaner data and optimize API usage effectively.
What’s the safest way to handle OAuth tokens, webhooks, and rate limits?
To keep OAuth tokens safe, make sure to store them in environment variables or use secret management tools - never hardcode them into your application. Also, set up automatic token refresh to maintain secure and uninterrupted access.
For webhooks, always validate incoming requests by checking the X-HubSpot-Signature header. Add retry logic with exponential backoff to handle transient errors and ensure reliability. It's also a good idea to log events for easier troubleshooting when issues arise.
When dealing with rate limits, keep an eye on your API usage to avoid hitting thresholds. Use throttling to control request rates and, for bulk syncs, schedule them during off-peak hours. This helps maintain system stability and reduces the risk of throttling.