Get insights like this delivered to your inbox
Join 2,500+ GTM professionals. No spam, unsubscribe anytime.
Subscribe to NewsletterHubSpot Lifecycle Stages are pre-built CRM properties that help you track where your leads and customers are in their journey. For B2B SaaS companies, they’re essential for aligning marketing, sales, and customer success teams. By automating transitions and defining clear criteria for each stage, you can improve lead quality, streamline handoffs, and measure funnel performance.
Here’s what you’ll learn:
- The 8 default lifecycle stages and their role in the sales process
- How to use Lead Status for detailed tracking without disrupting lifecycle stages
- Tips for automating transitions to reduce manual errors
- Metrics to monitor, like conversion rates and time in stage, to identify bottlenecks
- How to customize stages for SaaS-specific needs, like product-led growth or post-sale milestones
With the right setup, HubSpot’s lifecycle stages provide a structured framework for managing your funnel, improving team alignment, and tracking key metrics like conversion rates and sales velocity.
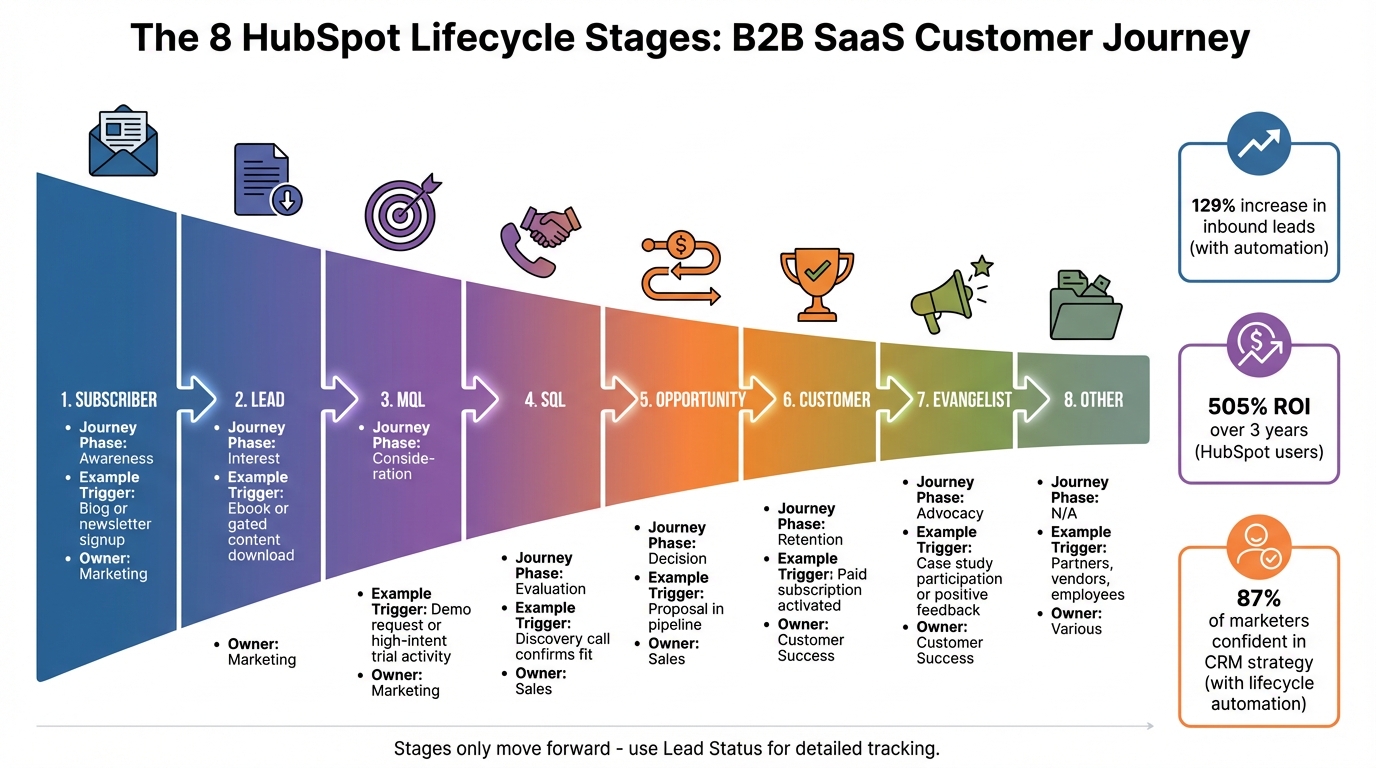
HubSpot 8 Lifecycle Stages for B2B SaaS Journey
The Expert Guide to HubSpot Lifecycle Stages
HubSpot's Default Lifecycle Stages Explained
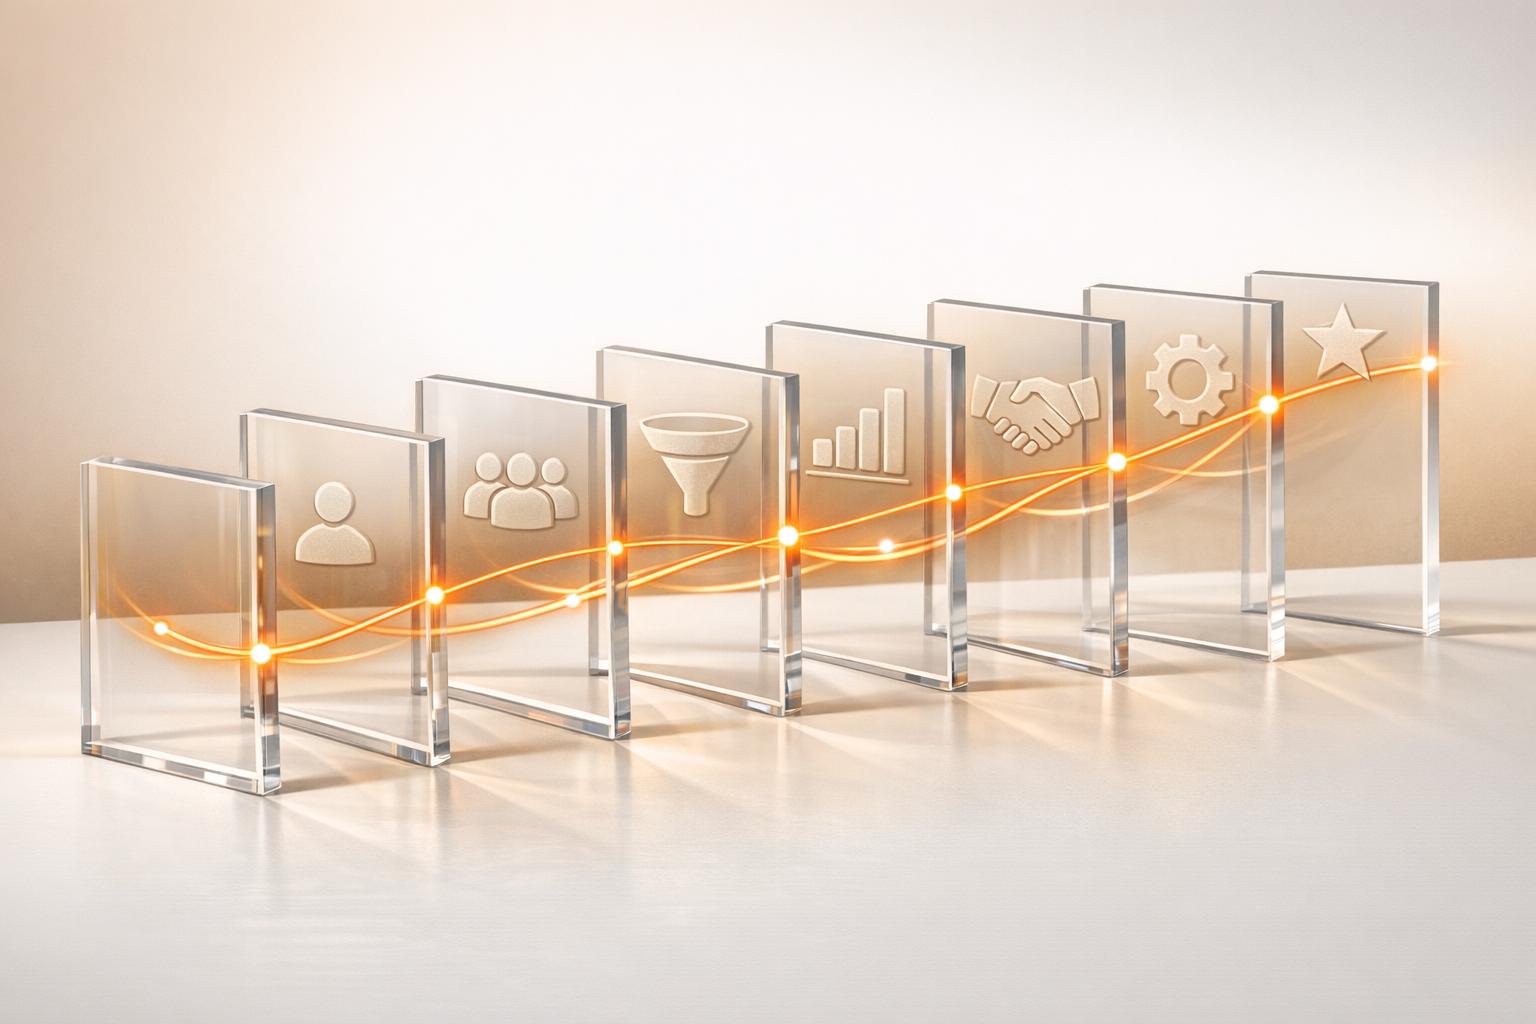
HubSpot offers eight default lifecycle stages that map out the entire buyer's journey. These stages are crucial for aligning your B2B SaaS sales process and resolving common misalignment issues. They also serve as the backbone for accurate funnel tracking. Let’s break down each stage and its role in your sales journey.
The 8 Default Lifecycle Stages
- Subscriber: This is where the journey begins. Subscribers have shown initial interest by signing up for updates, such as newsletters or blog content, but they haven’t yet expressed direct interest in your product. They represent the awareness phase of the funnel.
- Lead: Leads go beyond mere subscription. These are individuals who have interacted with your content on a deeper level - perhaps by downloading a whitepaper, attending a webinar, or engaging with other educational resources.
- Marketing Qualified Lead (MQL): At this stage, your marketing team has identified contacts as ready for sales outreach. For B2B SaaS, this often involves high-intent actions like requesting a demo or reaching usage milestones in a product-led growth model.
- Sales Qualified Lead (SQL): SQLs are vetted by your sales team and deemed genuine opportunities. Typically, this designation follows a discovery call that confirms a good fit. At this point, the Lead Status property tracks specific sales activities like "Attempted to Contact", "Connected", or "In Progress."
- Opportunity: This stage represents contacts tied to a deal in your pipeline. It’s the evaluation and negotiation phase, where prospects weigh solutions, review proposals, and navigate procurement processes.
- Customer: A deal marked as "Closed Won" signifies the transition to this stage. Customers are now paying users, marking the start of onboarding and retention efforts.
- Evangelist: These are your brand advocates - customers who actively promote your business. They might participate in case studies, provide testimonials, refer new clients, or share positive feedback.
- Other: This is a catch-all category for contacts that don’t fit the standard buyer’s journey. It could include partners, vendors, or employees - anyone you need to track in your CRM outside the traditional sales funnel.
| Lifecycle Stage | Journey Phase | Typical SaaS Trigger Example |
|---|---|---|
| Subscriber | Awareness | Blog or newsletter signup |
| Lead | Interest | Ebook or gated content download |
| MQL | Consideration | Demo request or high-intent trial activity |
| SQL | Evaluation | Discovery call confirms fit |
| Opportunity | Decision | Proposal in pipeline |
| Customer | Retention | Paid subscription activated |
| Evangelist | Advocacy | Case study participation or positive feedback |
Lifecycle Stages vs. Lead Status: What's the Difference?
Now that we’ve defined the stages, let’s clarify how they differ from Lead Status.
The Lifecycle Stage provides a high-level view of the contact's journey, shared across marketing, sales, and customer success teams. In contrast, Lead Status offers a more detailed look at specific sales activities. This distinction is especially important in B2B SaaS, where precise tracking of sales efforts is key.
"Lifecycle Stage = the big picture of each step the contact takes until they close. Lead Status = the smaller steps in between that document the lead's journey through the funnel."
– Fuelius
Lifecycle stages are designed to progress forward only, ensuring that conversion reports remain accurate and data integrity is preserved. If a lead goes cold or becomes disqualified, use Lead Status values like "Bad Timing" or "Unqualified" rather than moving backward in the lifecycle stages.
Lead Status, primarily managed by the sales team, provides insights into rep activity and follow-up speed. For Professional and Enterprise HubSpot accounts, metrics like "Date entered [stage]" and "Cumulative time in [stage]" are automatically tracked for lifecycle stages. These metrics help you measure funnel velocity and pinpoint bottlenecks in your sales process.
Aligning Lifecycle Stages with Your B2B SaaS Sales Process
HubSpot's default lifecycle stages offer a good starting point, but they need customization to fit your specific sales and marketing workflows. To make these stages work for your business, you’ll need to align them with clear, shared definitions and processes that every team understands and uses consistently. Start by outlining specific criteria for each stage, then refine your team’s workflows to match.
"The root issue isn't your tool. It's the lack of clear, shared definitions that everyone in your business understands and applies consistently." – Tony Joseph, Digital Litmus
Setting Stage Criteria for Your Business
For lifecycle stages to work effectively, each one needs four key components: an Owner (the team responsible for the stage), a Definition (what the stage represents), a Trigger (the specific action or event that moves a record into the stage), and Actions (the steps taken next, whether automated or manual).
Here’s an example of how to define the MQL stage:
- Owner: Marketing
- Definition: A high-intent prospect that fits your Ideal Customer Profile (ICP)
- Trigger: A demo request with a lead score above 50
- Actions: Assign to an SDR and send a confirmation email
Your triggers should align with how buyers actually behave in your SaaS business. For example:
- An inbound MQL might be someone who visits three or more feature pages and then checks out the pricing page.
- A product-led growth (PLG) MQL could be a trial user who completes 10 or more product actions.
These tailored triggers help determine when leads move into your sales pipeline and guide your team on how to prioritize follow-ups.
| Lifecycle Stage | B2B SaaS Trigger | Team Owner |
|---|---|---|
| Subscriber | Newsletter or blog signup | Marketing |
| Lead | Content download (eBook/Whitepaper) | Marketing |
| MQL | Demo request with ICP fit | Marketing |
| SQL | Discovery call booked or completed | Sales |
| Opportunity | Deal created in CRM | Sales |
| Customer | Deal marked "Closed-Won" | Customer Success |
| Evangelist | Referral given or case study created | Customer Success |
Before setting up workflows, document the entry and exit criteria for each stage. This clarity reduces manual errors and ensures your automated processes run smoothly.
Getting Teams Aligned on Stage Definitions
Once you’ve defined your lifecycle stages, the next step is ensuring every team sticks to these definitions.
Misalignment often occurs when marketing, sales, and customer success teams interpret stages differently. To avoid this, host a discovery workshop with leadership from all three teams. Use this session to agree on stage definitions and triggers before making any technical adjustments.
To streamline updates, enable HubSpot’s "Sync lifecycle stages between contacts and companies" feature. This ensures that when a company record updates to "Customer", all associated contact records update automatically. It’s a small but effective step to prevent reporting errors, such as a company being marked as a "Customer" while its contacts remain listed as "Opportunity."
Additionally, set the lifecycle stage property to "view-only." This ensures updates happen exclusively through workflows, reducing the risk of manual overrides. For example, sales reps won’t be able to move leads backward if a deal goes cold. These alignment measures are essential for maintaining the integrity of your revenue operations and keeping every team on the same page.
Customizing Lifecycle Stages for B2B SaaS
While HubSpot's default lifecycle stages work well for many businesses, B2B SaaS companies often need tailored stages to address specific challenges. These adjustments can help capture key moments like product-led growth milestones, post-sale achievements, and ensure data remains clean and actionable.
When to Add Custom Stages
For product-led growth companies, adding a stage like Activation can be invaluable. This stage tracks when users complete onboarding or perform their first meaningful in-app action. Similarly, post-sale tracking becomes more precise with stages such as Impact, which marks customer wins like reaching a usage milestone, and LTV, which focuses on renewals and expansions. To maintain a clean database, a DQ-Delete stage can be used to flag spam, bounces, or disqualified leads for periodic removal. This not only keeps your data organized but also helps lower Marketing Contacts costs.
"You don't need 30 different Lifecycle Stages. Instead, keep things focused and tie each Lifecycle Stage to a specific action." – Philipp Schirmer, BEE Digital
A real-world example: In December 2025, a mid-sized SaaS company revamped its lifecycle stages to improve efficiency. They defined six clear stages - Subscriber, Lead, MQL, SQL, Opportunity, and Customer. By automating transitions, such as moving to "Opportunity" when a deal was created and to "Customer" upon closing, they eliminated manual errors. This gave leadership access to accurate conversion velocity reports.
Once you've added or adjusted stages, it’s critical to standardize naming and document criteria for consistency across teams.
Naming Conventions and Documentation
Whenever possible, relabel existing stages instead of creating entirely new ones. For instance, if your team prefers "Open Deals" over "Opportunity", simply rename the stage. This approach ensures compatibility with HubSpot's built-in calculated properties, like "Date entered [stage]", and avoids potential integration issues.
"If you are, or plan to use, any Calculated Properties in HubSpot, they will not work with any completely new Custom Lifecycle Stages that you create. So, in this case, you would want to relabel existing stages instead of creating new ones." – Allen Helms, Organic Endeavors
Choose names that align with your sales process. Examples include "New Lead" for initial prospects, "Attempted" for SQLs being contacted, or "Ex-Customer" for win-back campaigns. Ensure every stage's Internal ID Value (API name) is documented to maintain seamless integration functionality despite label changes.
Finally, create a shared data dictionary. This should outline entry criteria, triggers, and the teams responsible for each stage. Make it accessible to marketing, sales, and customer success teams to ensure everyone is aligned and working from the same playbook.
sbb-itb-69c96d1
Automating Lifecycle Stage Transitions with Workflows
Manually updating lifecycle stages can slow down your processes and lead to errors. By automating these transitions, you ensure contacts move smoothly and accurately through your funnel. HubSpot workflows (available in Professional and Enterprise plans) make this possible.
Before getting started, it’s important to disable HubSpot's default automations, like "Set lifecycle stage when a deal is created." Leaving these enabled could interfere with your custom workflows. Once disabled, you can set up clear and specific triggers for each stage transition.
Common Workflow Triggers for B2B SaaS
The right triggers ensure contacts progress only when they meet your predefined criteria. For example:
- Lead-to-MQL: Require a phone number, a "Decision Maker" title, and a lead score above 50.
- MQL-to-SQL: Trigger this transition when a contact schedules a meeting using a HubSpot meeting link.
- SQL-to-Opportunity: Move contacts when a deal is created and linked to them.
For product-led growth strategies, engagement-based triggers work well. For instance, you might move a contact to MQL after they visit your pricing or about page more than 15 times or complete a trial setup event. These actions often indicate buying intent without direct sales involvement.
"A workflow is a set of automated actions that execute based on well-defined starting conditions." – Josh Ames, RevOps Help
Building Workflows for Specific Scenarios
To keep things organized and ensure accurate reporting, create one workflow for each stage transition. For example, have separate workflows for Lead to MQL, MQL to SQL, and SQL to Opportunity. This modular setup simplifies troubleshooting and minimizes conflicts.
When building workflows, include criteria for sequential progression. Even if a lead skips a step (like going directly from Lead to Customer), you should still record the skipped stages virtually to maintain accurate funnel tracking. Make sure your enrollment triggers account for the current stage and all subsequent ones.
Avoid enabling re-enrollment for lifecycle stage workflows. Allowing re-enrollment can distort historical data and affect timestamp properties like "Date entered [stage]", which are crucial for velocity reporting. Instead, use the "Sync lifecycle stages" feature to update all associated contacts when a company record moves to Opportunity or Customer.
If a contact stays in SQL for more than five days, you can use calculated properties to trigger a notification workflow for the contact owner. This helps prevent leads from stagnating.
| B2B SaaS Scenario | Workflow Trigger Example | New Stage |
|---|---|---|
| Inbound Interest | Form submission on "Contact Us" or "Demo" page | Lead or MQL |
| Content Engagement | 3+ feature page views + pricing page visit | MQL |
| Product-Led Growth | Trial user completes 10+ key events/actions | MQL |
| Sales Vetting | Lead Status updated to "Qualified" by a rep | SQL |
| Active Pipeline | First deal created and associated with contact | Opportunity |
| Closed-Won Deal | Deal stage updated to "Closed Won" | Customer |
Using Lead Status for Detailed Tracking
In revenue operations, Lifecycle Stages provide a broad view of where a contact is in your funnel, while Lead Status offers a more detailed snapshot of current activity. For instance, a sales-qualified lead (SQL) can have a Lead Status that reflects whether outreach efforts are working.
"Lifecycle Stage tells you where the contact is; Lead Status tells you what's happening now." – RevBlack
Tracking Sub-Stages with Lead Status
Lead Status is particularly useful for monitoring sub-stages within the SQL lifecycle stage. HubSpot provides default Lead Status options such as New, Open, In Progress, Open Deal, Unqualified, Attempted to Contact, Connected, and Bad Timing. These categories help prioritize sales efforts on a daily basis.
Many B2B SaaS companies customize these statuses to better fit their outbound workflows. Examples include adding statuses like Initial Contact, Engaged, Follow-up Required, or Meeting Scheduled. These customizations can also be automated with workflows. For example, you could automatically update a lead's status to Open Deal when a deal is created or set it to Connected when the lead responds to an email sequence.
When marking a lead as Unqualified, it's helpful to select a specific reason (e.g., poor fit, bad timing, or competitor). This creates a feedback loop for improving marketing strategies and refining messaging. Similarly, leads marked as Bad Timing can be added to nurture sequences, ensuring they aren't treated as lost opportunities.
This level of detailed tracking helps define clear boundaries between Lead Status and Lifecycle Stages.
Preventing Overlap Between Lead Status and Lifecycle Stages
Once detailed Lead Statuses are in place, it’s important to keep them distinct from Lifecycle Stages.
Assign clear ownership to each. Marketing teams typically manage the early Lifecycle Stages, while sales teams should oversee Lead Status and later stages. Use Lead Status for short-term, tactical sales activities - mainly within the MQL (marketing-qualified lead) and SQL stages. Avoid duplicating your entire funnel within Lead Status. If a lead needs to be recycled, adjust its Lead Status or use a custom property instead of moving it backward in the Lifecycle Stage.
Custom CRM views filtered by Lead Status can help sales teams quickly identify promising leads that haven’t been contacted yet. Additionally, defining clear handoff points - such as initiating sales outreach when an MQL’s Lead Status is Open - ensures smoother transitions between marketing and sales teams.
Tracking and Improving Lifecycle Performance
Once you've automated your workflows, the next step is performance tracking. This fine-tunes your revenue operations by identifying areas where processes can be streamlined.
After automating lifecycle stages, it's crucial to measure performance to uncover bottlenecks and inefficiencies.
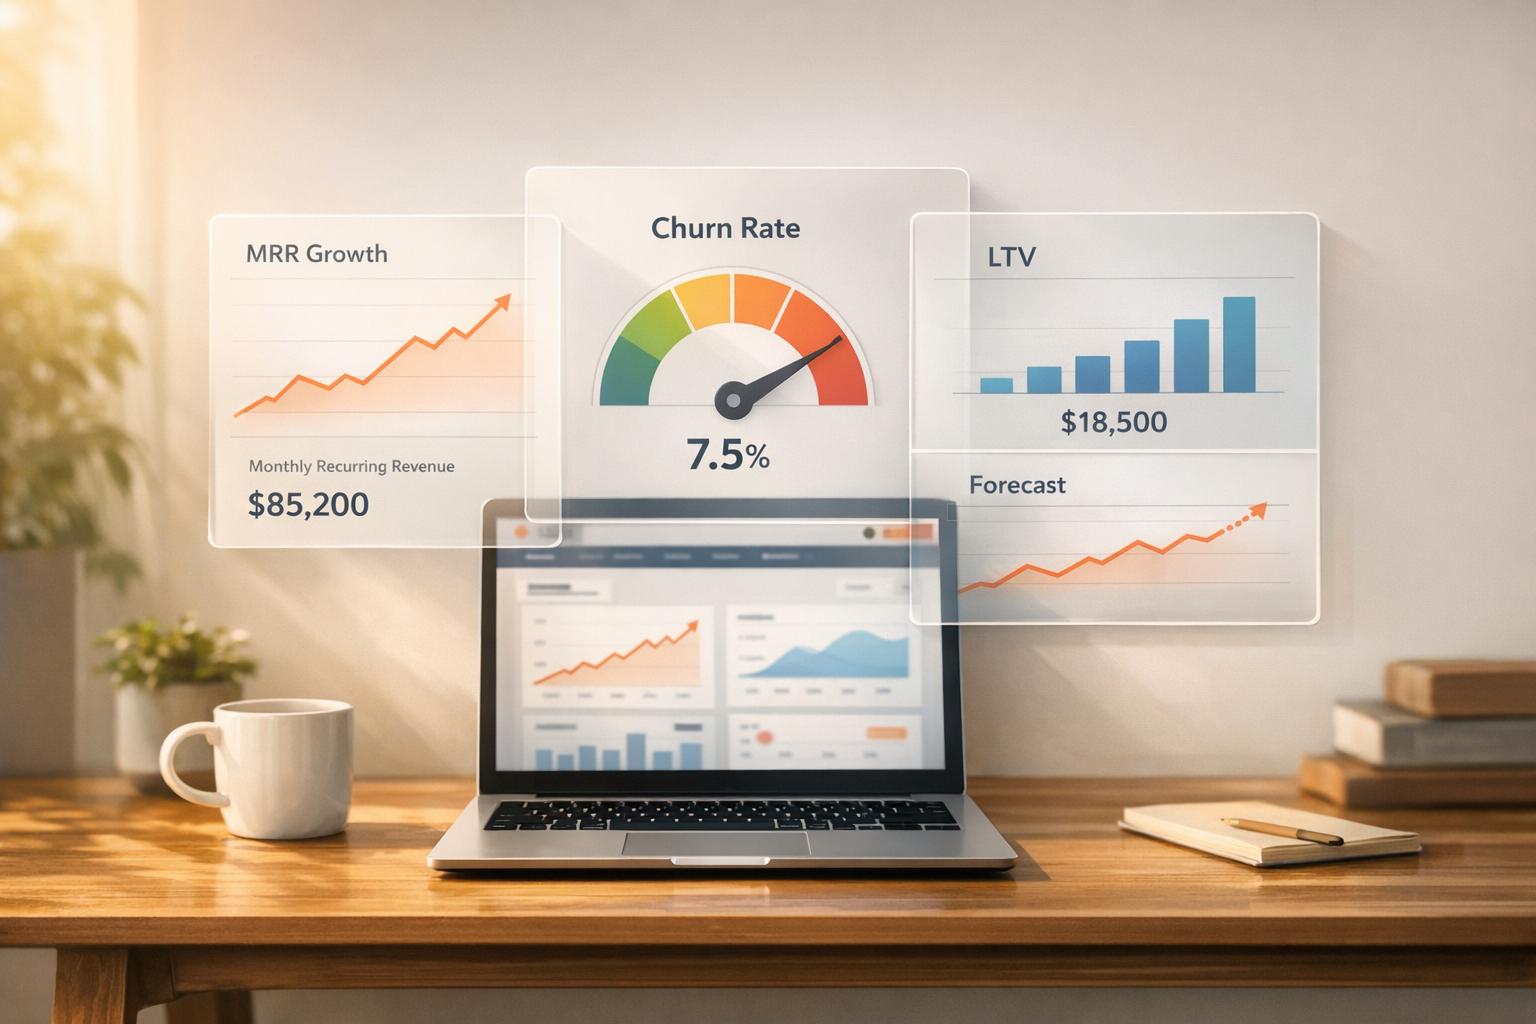
Metrics to Monitor
There are three key metrics to focus on: volume, conversion, and time. Here's how they break down:
- Volume: Tracks the total number of contacts at each stage, giving you a snapshot of your funnel's overall health.
- Conversion Rates: Measures the percentage of contacts moving from one stage to the next, such as from MQL to SQL or Opportunity to Customer. A drop in conversion rates between stages could indicate issues in your handoff process or qualification criteria.
- Time in Stage: Shows how long contacts remain in a given stage. For example, if leads linger too long in the Sales Qualified Lead stage, it might suggest a need for better follow-up strategies.
HubSpot provides key properties like Date entered, Date exited, Latest time in stage, and Cumulative time in stage to help you track these metrics. Additionally, lifecycle velocity - the time from contact creation to deal close - offers insights into the overall speed of your sales cycle.
Other valuable metrics include contact lifecycle cost (total campaign spend divided by the number of influenced contacts in a stage) and adoption metrics, such as identifying "stuck" records or "orphaned" opportunities without associated deals.
| Metric Type | What It Measures | Why It Matters |
|---|---|---|
| Volume | Total contacts per stage | Indicates top-of-funnel and mid-funnel health |
| Conversion Rate | % moving from Stage A to Stage B | Highlights friction points in the sales process |
| Time in Stage | Days/hours spent in each stage | Identifies where leads stall or get stuck |
| Lifecycle Velocity | Time from creation to close | Assesses overall sales cycle efficiency |
Once you've defined these metrics, HubSpot's reporting tools can help you visualize and analyze your funnel performance.
Creating Lifecycle Reports in HubSpot
HubSpot's funnel reports make it easy to track stage-to-stage conversion rates. Use the "Became a [Stage]" metric to monitor how many contacts moved into a specific stage during a set timeframe, regardless of when they were created. This is different from "New [Stage]" metrics, which only count contacts created within your selected date range that are currently in that stage.
To pinpoint bottlenecks, leverage the Cumulative time in [stage] property in your reports. For example, if the average time in the Sales Qualified Lead stage exceeds your service-level agreement, set up an automated internal task to prompt follow-up actions. You can also create custom reports combining lifecycle stages with original source data to determine which marketing channels generate the highest-quality MQLs that convert to customers.
Consider building a "Lifecycle Performance" dashboard. Include stage-by-stage conversion rates and a list of contacts whose lifecycle stage hasn't been updated within a specific timeframe to identify unengaged leads. For Enterprise users, HubSpot's customer journey reports allow you to track up to 15 stages, analyzing up to five years of data and 20 million unique events. Use the "Break down by property" feature to uncover which campaigns or content assets are driving the most conversions.
"HubSpot lifecycle stages are built into the CRM to show where someone is in their journey. They align marketing, sales, and customer success while providing clear numbers on volume, conversion, and time." – Adam Statti, RevPartners
One thing to watch out for: HubSpot lifecycle stages only move forward by default, which means contacts can sometimes skip stages. For example, a contact might jump directly from Lead to Opportunity. To ensure accurate conversion reports, use workflows to backfill skipped stages. Lock the lifecycle stage property to view-only so that only automation can update it, reducing manual errors.
Conclusion
Setting up lifecycle stages in HubSpot goes beyond simply organizing your CRM - it's about creating a shared framework that unites your marketing, sales, and customer success teams. With everyone working from the same playbook, lead handoffs become smoother, forecasts get sharper, and attribution becomes a science, not a guessing game.
The numbers speak for themselves. Companies that effectively map lifecycle stages and back them with automation see a 129% increase in inbound leads on average. HubSpot users report a 505% ROI over three years. And when 87% of marketers using lifecycle automation feel confident in their CRM strategy - compared to just 52% without it - the advantage is undeniable. These stats highlight how aligning lifecycle stages with your strategy can transform your business outcomes.
To make this work, start with a discovery workshop that pulls in voices from across your organization. Define clear triggers for each stage shift, disable HubSpot’s default automations, and build custom workflows tailored to your B2B SaaS model - whether it’s inbound, product-led, or a hybrid approach. Lock the lifecycle stage property to view-only access, ensuring updates happen through automation, not manual inputs, which can lead to errors.
Don’t stop at "Customer." Expand your lifecycle stages to include post-purchase milestones like Activation (onboarding complete), Impact (value realized), and LTV (renewal or expansion). This extended framework lets you track the entire customer journey, from acquisition to long-term value. Monitor key metrics like time in stage, conversion rates, and stage volumes to spot bottlenecks and refine your process. Create a feedback loop so teams can flag any issues with stage assignments, ensuring your data stays reliable.
When done right, lifecycle stages become more than just a CRM feature - they become the backbone of your entire go-to-market strategy, keeping every team aligned and your KPIs grounded in reality.
FAQs
How do I set up and customize HubSpot lifecycle stages for my B2B SaaS business?
To set up and fine-tune HubSpot lifecycle stages for your B2B SaaS business, start by mapping out the key steps in your customer journey. Common stages include Lead, Marketing Qualified Lead (MQL), Sales Qualified Lead (SQL), Opportunity, and Customer. Adjust these to fit the unique flow of your sales and marketing efforts.
In HubSpot, you can customize these stages by heading to the lifecycle stage settings within your CRM. Here, you can add new stages, remove unnecessary ones, or rearrange them to better align with your processes. To streamline operations, use automation tools to sync and update lifecycle stages across contacts, companies, and deals, ensuring your data stays consistent.
Keep your stages straightforward and actionable. Regularly evaluate how well they’re working and tweak them as your business evolves. Clear and well-defined lifecycle stages not only make lead tracking easier but also boost reporting accuracy and improve your overall revenue management.
What’s the difference between Lifecycle Stages and Lead Status in HubSpot?
In HubSpot, Lifecycle Stages outline the key milestones in a contact's journey with your business - such as becoming a Subscriber, progressing to a Lead, or converting into a Customer. These stages give you a clear view of how contacts move through your marketing, sales, and service processes.
Meanwhile, Lead Status serves as a more granular tool, mainly used by sales teams. It tracks the specific progress of a lead within a particular lifecycle stage, with statuses like New, Open, or Qualified. This helps provide a closer look at how leads are being handled and where they stand in the sales pipeline.
To put it simply, Lifecycle Stages show the overall journey, while Lead Status breaks it down into detailed steps along the way.
How does automation help ensure accurate lifecycle stage updates?
Automation takes the guesswork out of lifecycle stage updates by assigning and syncing stages automatically according to set rules. This reduces the chance of manual errors and ensures your records stay current and in sync with your sales and marketing workflows.
With automated lifecycle stage transitions, you not only save time but also enhance the accuracy of your lead management. This smooth process supports a more seamless customer journey and provides your team with dependable data, enabling smarter decisions and more effective reporting.